Navigation Menu Updates
Navigating to the Menus Area
1. To update your header or footer menu, go to Appearance > Menus in the WordPress admin
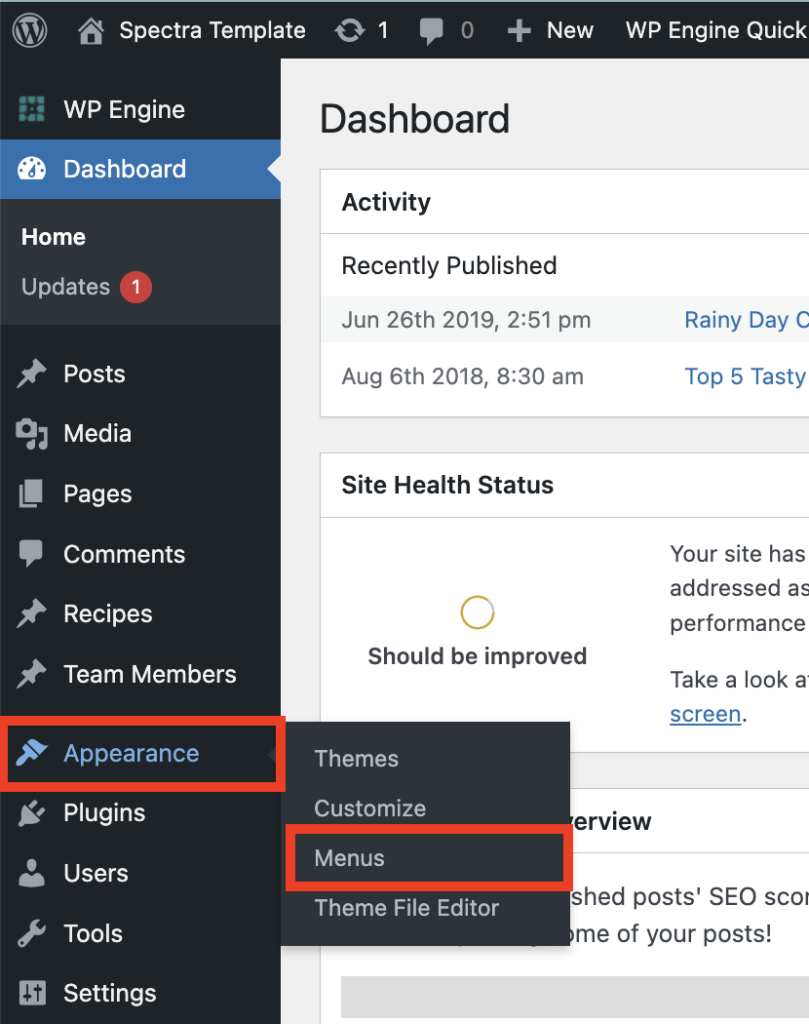
2. At the top of the page, select Header or Footer

Removing a Menu Item
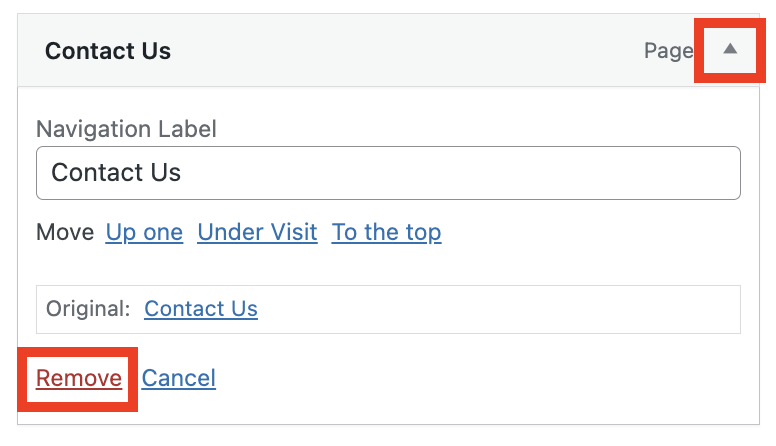
1. Click on the small arrow in the top left of the item you want to remove to expand it
2. Click on the red REMOVE link
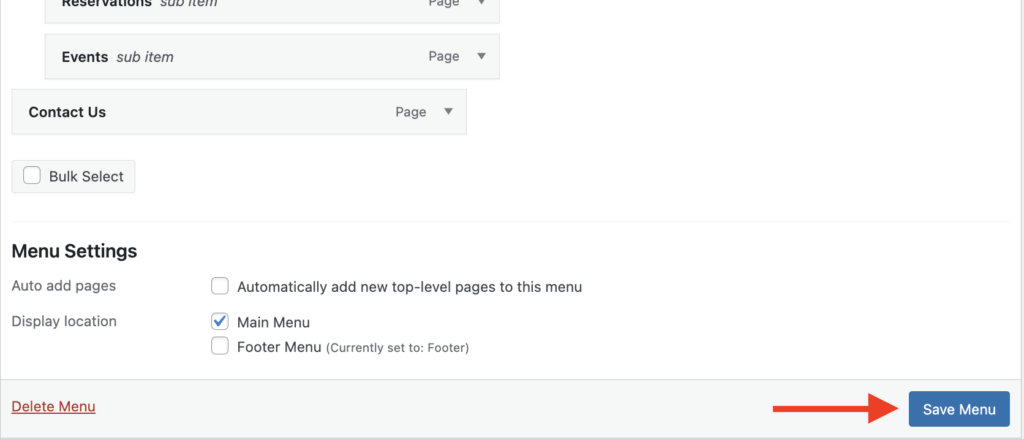
3. Click the blue SAVE MENU button in the bottom right to publish your changes
Adding a Menu Item
A. ADDING A PAGE
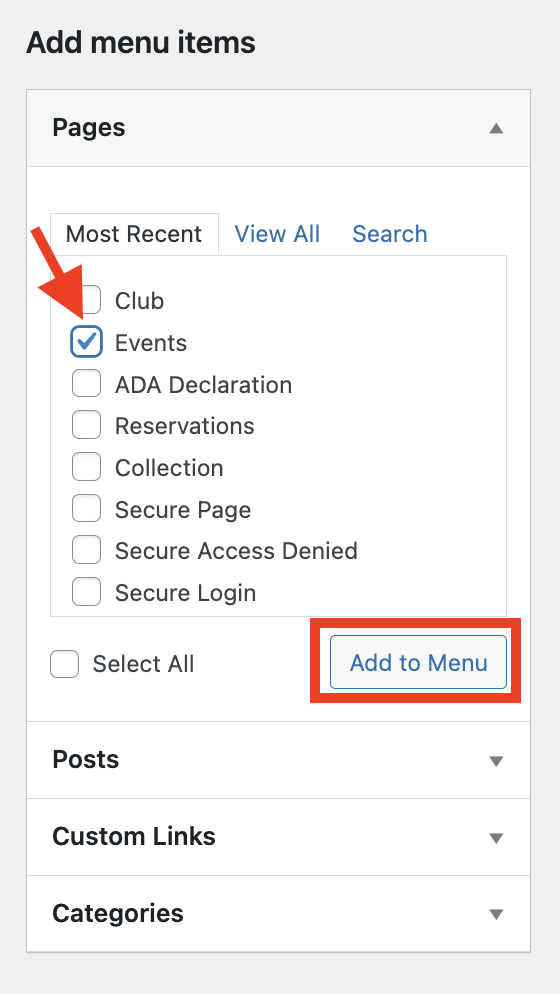
1. In the Pages section, find the page you want to add and check the box next to it. If you’re having trouble finding the page, go to the Search area instead of the Most Recent area
2. Click the ADD TO MENU button
3. The item will be added at the bottom of the menu. Drag and drop it in the order you want. If you want it as a dropdown under a page, indent it under that page.

4. Click the blue SAVE MENU button in the bottom right to publish your changes
B. ADDING A CUSTOM LINK
You can also add an item to your menu that doesn’t lead to a page on your site. This can be a link to an external website or simply a menu item that’s not clickable but has other clickable items under it. To do this, use the Custom Link section:
1. For a link that click through to an external site:
- Add the external site URL in the URL field
- Add the label you want to show in the menu in the Link Text field

2. For a non-clickable item:
- Add a pound sign (#) in URL field
- Add the label you want to show in the menu in the Link Text field

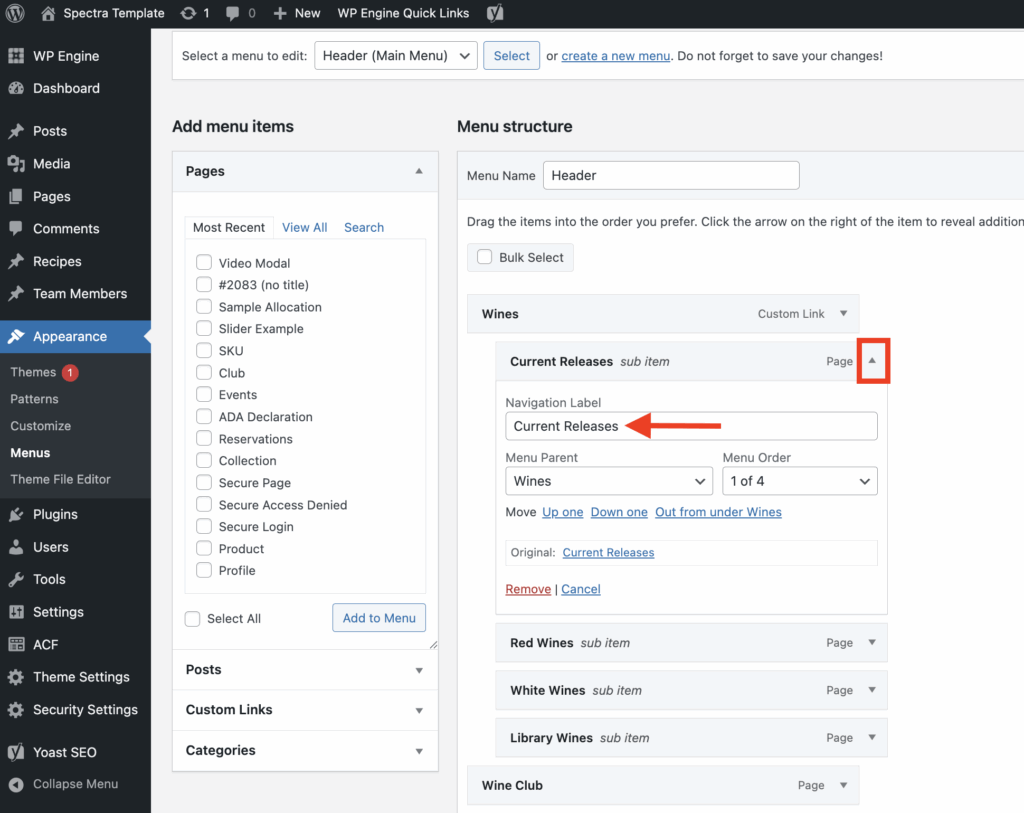
Updating Menu Labels
You can easily update the navigation label, the wording for a specific item in the menu by clicking on the arrow to expand the item, then replacing the current label with your desired text.
Note that this does not change the WordPress page name or URL. If you to update these, go directly to the page.